Sewing Vloggers

Tuesday, December 29, 2009

Lots of this and that and even some Chanel!

I can't hold back, so why not first the Chanel?

Over the holiday season this little blog welcomed it's 100th follower and then some. To celebrate I would like to give away this charming paper doll book of Chanel designs by Tom Tierney. It is on v. heavy glossy paper. The designs are fabulous. If you are interested, first, a big welcome to La Sewista. Then please leave a comment with where you are from, ie, Karen, Los Angeles, or just a state or region. I will let this run till the weekend and then Random.org a winner. I so appreciate all of you visiting. If you are not a follower, sign up and get in the running for this sweet little book.

**************************************************************************************


I am nearly done the smocking on Sophie's Cranberry dress. The design requires two rows of double featherstitching. I have worked this stitch before but only on flat fabrics. On a pleated print it is very difficult to gauge the width required for each stitch. I decided to help this along by lining up 1/4 inch masking tape above and below the area for the featherstitching.  Now my eyes can easily gauge the width needed for each stitch.
************************************************************************************
MAGAZINES, AH, THE MAGAZINES!
Yesterday I received in the mail my Sew Beautiful and the latest Burda.


 First, the SB: People seem to be quite opinionated about SB lately. Personally, I think it has become a shill for  Martha Pullen's  machine embroidery, a far stretch from the heirloom sewing inspiration it used to provide. I guess that is Martha's prerogative. The Christmas issue was close to tossable and I doubted I would renew. That has all changed with this issue. The exquisite cover graces a fabulous issue. The theme of ribbons was on every page with so much beauty to inspire. I am talking using ribbons in very unique ways, visits to ribbon experts, and so much more. This is what I call a real "cup of tea" issue, the kind you sit and savor in private and dream of what you can do. Congratulations to SB on this wonderful effort. If you continue with this quality they will be standing in line to subscribe.

Then there was Burda : If there is an editor or photographer out there who thinks the photos in this issue (other than the snow pics) show me a garment I would like to sew, fugetabotit. It all looks like a mass of bunched up fabric on the human body. That would be fine if that were the intended design, but many of these garments have details. And the white gauze on the black wool tights, yuk. Thank goodness for the technical drawings!
Does anyone really thing those pants that end below the calf and have pleats out near the side seams are flattering? I could go on and on. I will just leave it to all of you to make your own judgments. The blouse I feel like currently making will certainly come from an older issue or the Big Four. One great garment, IMO, that leather number with the studs on the flaps. Yummy! JMHO.
************************************************************************************

I hope you all are having a great holiday season. The New Year is now upon us, always a time for reflection. I am going to keep it simple and just sew as much as I can for as many as I can in the next year. I also hope to share it all with all of you. Happy New Year and the happiest of designing and sewing in 2010! ....bunny

ETA: Cutoff time for the giveaway will be 3:00 this afternoon, January 2.2009. Don't miss the fun!

Thursday, December 24, 2009

Merry Christmas to All!

Just a stop in this hurried season to take a moment to wish all my blogging friends a wonderful Christmas and a prosperous New Year. I hope you are all able to spend the holiday with those you hold most dear. As far as prosperity in the New Year, can it get any worse? So I know it will be better for all next year.

I have been smocking away on Sophie's dress and spending Q-time with family and friends. I will leave you with a picture of Carly in her holiday dress, standing next to her crib.

Merry Christmas


Friday, December 11, 2009

It's beginning to look a lot like Chrismas!

Thank you to all  who left such sweet comments on Carly's coat. I really appreciate all of your words and look forward to reading them every day.  While I think I would blog about sewing if no one ever found me, your following has made this experience such a treat. I have learned so much from all of you and hope I can do the same in some small way. Thanks again.

Chickadee Workshop was wondering what "happened" to all these clothes once they are outgrown.  DD#2, Mom of Sophie, packs hers up and gives them to DD#1 for Carlie. After Carlie has used them they are carefully packed away for the next generation, seriously. This is why it is called heirloom clothing. People in the Southern part our country, my birthplace,  have been doing this for generations, which I think shows such a wonderful respect for classic design and skill.  I distinctly remember my cousins children wearing the same dresses to Easter Sunday services that their moms wore and that their grandma, my Aunt Tita, had made them. If you study children's clothing, at least what is available high end, much of it has been made in the same style for years. Check out the Wooden Soldier catalogue for some great ideas. So, these little garments will be carefully cleaned and packed away with the archive tissue for the next group of babies.
*************************************************************************************

This brings me to my next project. I will call it Sophie's Cranberry dress.

My plan is a smocked yoke dress with puffy sleeves, very classic. I don't really have a pattern for this so will pull together pieces from different patterns to make this work. My inspiration is this dress from "The Best of Australian Smocking and Embroidery". The book has pictures and plates, no patterns or recommendations so you are on your own there. It is a great book however and I will do an adaptation of this design:


Sorry about the big glare from the flash against the glossy paper, but I think you get the idea. I'm not sure how I will work out the prints but I will "make it work." I am going to pleat this as soon as I am done posting and will start smocking tomorrow.

************************************************************************************

DH and I are trying to buy local for our Christmas presents as much as possible. We are blessed with many Amish neighbors but about 30 miles from here is the largest settlement of Amish in NYstate in a little town called Heuvalton. We have bought a few things from our local Amish farms but today took a ride to Heauvalton and went shopping on several different farms. We got all sorts of things from leather goods to baskets to aprons, etc. Here is a picture of the baskets we purchased froma sweet young couple who seemed so greatful for our purchase. It was clear they were just starting out. Mr. Zook signed and dated all of his baskets which I thought was just wonderful. They are really beautifully made. We also purchased from a Mennonite family, right here in our little village, some wonderful jellies that have quite a reputation. The jellies and some other local Amish and Mennonite treats will go into the baskets which will given to our loved ones. I am really excited about these gifts and also very excited about buying local. When it is a three hour drive to a Toys R Us, you can get pretty clever with your shopping and the best is that you learn in the end you really don't need a Toys R Us and you can help someone support their family. Buying local keeps the money local which we all know means it is not going off shore. Is there anything in your area that is unique and you have access to that would make a great gift for the holidays? If so, I would love to hear about it..........Bunny


The star basket is a lazy susan!

Tuesday, December 8, 2009

The Little Red Coat


Carly's little red cashmere coat is now complete. I had a dickens of a time photographing it. I don't know if there was too much contrast or what but these are the best pics I could get out of very many.  It does look much cuter IRL.
The pattern is from Gail Doane's "Sew Cute Couture". I did the following changes to Gail's wonderful design.

* I made the sleeves 2 inches longer to accommodate Carly's measurements. Gail's garment is really a swing jacket. I lengthened it 2 1/2 inches to get the length I wanted. The pattern is lined edge to edge so there was not much fudge room here. Therefore,


* I decided to make a free floating lining and do a faced hem to maximize the length I had available. I eked out every square inch of this piece of cashmere. On the lining you can see how it is just gathered and pressed flat in the pleat area. I thought if I did a pleated lining it would just bulk it up too much. this worked fine.
* I did bound buttonholes.


* I did a different configuration of the felted hearts on the coat. Just a personal design decision.
* I decided to do the big "hamburger" bullions on the collar only. All of the other hearts have more traditionally sized bullion roses.

Carly has v. short platinum hair and will be able to show off the work on the collar. Grandma's no dumdum.

* My fabric was 100% cashmere from Fabric Fix in Manchester, NH, purchased about two years ago. The lining was 100% cotton homespun.
* Buttons were covered with a lined piece of the homespun.
* Interfacing was a weft insertion. If I did this again I would use a much firmer interfacing for the collar front facing area. The soft cashmere really needed some stiffness up in the button area. Live and learn.
* This is Carly's winter dress coat and I know her mom will make good use of it. Carly and brother twinlet Zak attend a lot of birthday parties, going from the house to the van and back to the house. Carly will learn at a young age how to enter a room in a killer outfit. Doesn't every young lady need to know this? This won't be used for any outside play. Heaven forbid! So I did not do a flannel interlining. I had enough bulk to deal with as it was.
* Zakie is not forgotten. Grandma Bunbun will make him a felted Pendleton wool beret.
* Now Carly has her toile dress with the matching plaid piping, her cashmere cloche with the cockade, and her little cashmere swing jacket. Does it get any better than that?


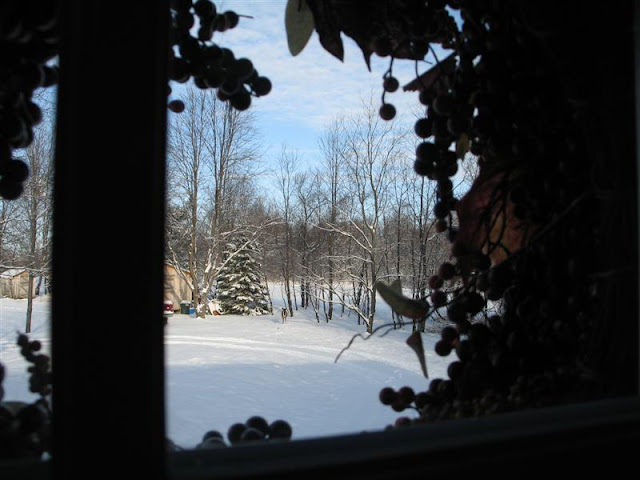
And check out this picture DH took this AM thru the window on the door and the wreath, too cool.

Yes, that's Bambi stopping by for a munch on the apple tree's last remnants of fruit.....Bunny

Sunday, December 6, 2009

Express Sleeves and Maxing out the Hem on the LRC

The coat is done except for the three buttons to be sewn on. Pics will be coming but its late and I also wanted to first share with you a couple of techniques I used.

I decided to use Nancy Zieman's "Express Sleeve" and I am very pleased with the results. It is easy and quick and gives a lovely tailored finish.

* First cut the two sleeves and linings making sure all markings are clear.
* Cut off the width of the seam allowance from the lining hem edge ONLY . In my case this was 3/8ths of an inch cut off the wrist edge of the sleeve lining.
* Sew the lining and sleeve together at the hem edge.
* Press to meld. Press seam open. Then match the armscye edges of the sleeve and the sleeve lining. This will pull up the fashion fabric to the wrong side the width of the seam allowance.


* Press the sleeve hem edge again with the new fold you just created.
* Carefully line up the seams of the sleeves taking cared with the junction of the fashion fabric and the lining fabric.
* Sew them all the way across taking care to match when you cross the intersection at the hem edge. You are sewing from  armscye to armscye.


* Press the seams open. This is a great chance to use your seam stick. My seam stick is a 1 1/4 inch dowel I bought at Joanns and cut to 18 inches. Love it. You can see I am using a press cloth which is critical with cashmere. Cashmere is very much like hair and scorches easily at higher heat. A pressing cloth is a must.
* Stitch the fashion fabric sleeve into the armscye in the manner you prefer. For this little coat I did a second row of triple zigzag stitching. Then I cut back to that but only in the underarm area. The SA was left in tact and pressed toward the sleeve for a nice finish, kind of a scaled down sleeve head. 
* Once the fashion fabric sleeve was lovingly pressed I reached thru and grabbed the lining and pulled it thru the sleeve. The underarm seams were matched up. The lining sleeve gets its SA turned under and pinned, then stitched to the coat lining.


  This really took just minutes and is such a nice finish. The sleeve is now done.

Another challenge on this coat was dealing with the hem, neck, and CF edges. Gail Doane's pattern is lined to the cut edge and then bound with bias. I wanted buttonholes as well as a longer length for my little coat. I measured my buttons earlier and new I needed to add a bit to the CF. Then I did my buttonholes. I cut an edge to edge lining but didn't really want that. I just don't have good luck with them, finding that they can easily bag in spots. It took me a bit to wrap my head around how I was going to get the needed longer length and the buttonholes in but here is what I worked out:
* My lining was cut edge to edge  and included the new additional width for the buttonholes
* The edges of the lining were interfaced like a facing from neck to hem. 
* I folded under and pressed the lining hem edge 1/4 inch and then turned it another inch. I triple zigzagged it to hem it.
* The hem of the coat was interfaced as well. I needed something to catch my hemstitches on. I fused on a weft insertion that I love, 60 inch width and all.
* I cut a 2 1/2 inch wide bias band for the hem and folded under the top long edge 1/4 inch and pressed that in.

* The collar was basted on. Then the lining was sewn on leaving the last 2 1/4 inches near the hem unstitched.
 * The bias band was placed right sides together and stitched to the bottom edge of the coat. I stitch around the corner, which I had rounded, and up to where the lining stitching stopped.This was then pressed.
* The hem was now catchstitched to the weft insertion interfacing.
* The lining bottom corner was folded in and hand stitched to the hem band.

The coat is done and waiting for the three buttons. Hopefully pics will happen soon. I think this will be a challenge to photograph without a child in it.  Till then........Bunny

Tuesday, December 1, 2009

Missoni "type" Top

I found this great fabric on the last Joanns clearance fror 2.50 a yard. There wasn't much left on the bolt but the top I was making didn't need much. Then I decided to change my mind on the pattern, started the layout, and with the matching required really needed some creative problem solving. I just did not have enough to match all the seams. Hmmmm,,,,I slept on it, and of course had one of my nightime eureka moments. The hip band on this pattern, Simplicity 3790, view B, had the bottom edge on the fold. If I added a seam allowance there and cut a facing for the inside instead of using the fold for the entire piece I could pull it off. I had enough to match the outer band and for the facing, well, who cares? So I managed to get it all matched. Made this puppy this morning within two hours. I think I will make it again it is so fast and easy.

Here is the blousey version and the back.


About the pattern Simplicity 3790, View C:

* I flat measured and then knew this would fit without any alterations.
* I decided to not do the inset and just leave the v-neck wide open. 
* I used two rows of a v. narrow zigzag, 1.0 wide and 1.5 long. Just wasn't in a serging mood today.

*Because the fabric was stretchy I stabilized the shoulder seams with some silk selvedge from my selvedge bottle. Do you cut off selvedges from your fabrics and save them in a jar? Comes in real handy.
*I used Steam a Seam 2 for the sleeves and bottom hems. Love that stuff!
*I did View C with the smooth hip band but cut the longer 3/4 sleeves. 

And that is about it, pretty simple, quick, and now RTW.

*************************************************************************************

Feeling better today but still seeing the doctor tomorrow. Thanks for all the good hints and wishes.

Thanks also for all of your feedback on the Channel jacket. The pattern is up for anyone who wants it. Just wing me an email and first one gets it. Sizing goes from xtra small to xtra large "ready to wear". Go figure! In other words all the sizes are in the envelope.

On the Little Red Coat I am doing the last of the bullion buds and should finish today. Then it is finally construction. The pattern is for an edge lined, bias bound jacket, no buttons. Mine will be a faced hem, to max out the length, separately hanging lining, and bound buttonholes. Keep you posted!

Here is a shot of the back yard at lunchtime. It is a grey dreary day with quite a few more predicted, just what I need for some happy stitching.....Bunny

Sunday, November 29, 2009

Connie Crawford B5336

I have been slowly nurturing the idea of making a Chanel jacket for myself. I have found some great fabric, but until I hone in on the pattern, I don't want to buy it. The fabric I want is quite expensive so I am not looking to waste. My first choice pattern would be Claire Schaeffer's Chanel jacket from Vogue, OOP and really hard to find. I will keep looking though. In the meantime I found this Connie Crawford pattern that has a two piece sleeve and the shoulder princess seams. It has a shawl collar too, but that would be nixed. Here is Butterick 5336


Here is my dilemma. Connie's pattern innards say, " These patterns are designed for full figured women's proportions. Each pattern is specially fitted for rounded shoulders, (don't have), fuller stomachs, (not really) and thicker waists...." Am I barking up the wrong tree here?  The pattern is offered in extra small, whatever that is. It seems closest to my measurements. But her sizing also suggest getting this by your retail size. Confusing for the non full proportioned woman. I am an aging hourglass, still have a waist, need a good bra for my Cs, and have very narrow shoulders and back. Am I wasting my time here? Does anyone have any experience with this pattern before I go the muslin route? I will definitely be making a muslin, but would like to keep down to the single digits! I really like this jacket but don't want to waste my time. Can anyone help? It would be greatly appreciated and thank you ever so much...

Just when I think I am getting back to my old self I get knocked off my saddle. I swear I have a UTI now and will see the doctor on Wednesday. Just want this s--t to be over with. It is cutting into my joy for life, I tell ya. Oy,,,,,,,,Bunny

Sunday, November 22, 2009

Little Cashmere Hat with Cockade

I did a search on cockades thru Google images. Most were folded or pleated ribbons with a central element, maybe a button, special feather, or medal. I was on the right track. I had one of my embroidered samples to play with and a bit of leftover lining fabric. Here is Carly's hat:

I think it will be darling with the coat. Right now I am starting all the bullions. I have decided to go with Gail's wonderful design with my adaptations. There will be no buttons. The hearts were felted white wool that I further needle felted into the cashmere. I did a little extra embroidery around the edges with chain stitches and a blanket stitch. My bullion roses will be an orangey red. The red/pinks just did not work with all the black and white in the ensemble.

This hat took me no time to make, literally. I used the hat in Butterick 6030, a boy's pattern. There were quite a few hat patterns in my stash but this was the closest I could get to the cloche look I wanted. One thing about this pattern. It has you use 1/4 inch seams and they are printed on the sections and referred to in the pattern. My 1/4 inch quilting foot came in really handy for this, especially matching up the points at the top of each section. Lining the point up with the appropriate marking on the foot made them perfect.

This pattern does not tell you that the seams to close the brim and attach it to the crown are 5/8ths. My gut told me to double check. It's a good thing. Knowing that, I can tell you this is beautifully drafted.It's not often a hat pattern with sections like this fits the brim so perfectly.

This is how I handled the collar. I cut it in a block but cutting the outside edge correctly and snipping where the neckline began. This way I didn't risk the bias neckline edge stretching out while I did all the handwork. It seems to be holding its shape so far.


This has been a great recuperation project. It has tons of embroidery I can do while "resting", something I am not good at. All this embroidery has held my attention long enough to get the needed rest and I feel on the mend, not there yet, but getting there. Making this little hat for Carly's outfit took about two hours at the machine and iron, much of it standing and ironing. I can feel it now and will get back to my nest and my bullions. This is getting close to done. Think I can get another smocked dress and coat done before Christmas? I sure hope so.........Bunny

Sunday, November 15, 2009

Little Red Coat Part 4?

I am losing track. Is it Part 4? No matter. Yesterday as I was still fiddling with the embroidery design for the coat it occurred to me that it would be just downright inappropriate to not have bound buttonholes. I have done these many times but because time elapses in between efforts I always need a review. Pulled out all the basic sewing manuals and even , en homage, pulled out Adele Margolis's book. I tried 4 different methods and as usual decided on the windowpane method. This really works best with this bulky fabric and small size. they are only 3/4 inch wide. Here is my sample.


Today's plan, keep resting, and get the three little bound buttonholes in......Bunny

Saturday, November 14, 2009

Felted Wool Bag Completed


Finished this little number this morning and I think it is perfect for my barteree, or is it barteror? The lining is from one of those poly blouses of Ima's that I took home. I added the key chain and a triple pocket, all pretty simple construction.

This was a lot of fun to do and I hope to whip out a few more before the holidays. In the meantime it is back to Carly's coat. I have decided on a third "heart" embroidery. It is pretty much  the same as the non felted one but with different colors and some outline stitching added in for highlight. I think the linearity of the embroidery will go better with the graphic of the dress print. Frankly, though, I think either would have been OK. Now I have to dig thru my patterns for a hat for the ensemble. I want Carly to have a cloche. I have located a couple of adult patterns on the web and may just size one down. But I will check the stash first.

*************************************************************************************

Yesterday was a rough day. I had a mandatory errand in town which put me next to the supermarket and Joanns, not a good thing. I did the errand, ran into the supermarket and told the cashier  to please make sure the weight of the groceries was spread out very thinly in the bags. She did but they were still bags of groceries. Pushing that carriage didn't help the situation either and I was really wishing DH was with me. I went on to Joanns, stupe that I am, and sat at the pattern table for a looooong time. Then I went and grabbed the Missoni print I had hidden in the clearance area, I know, got it cut at its 50% off clearance price, and came home. This was all waaaaay toooo much. Talk about exhaustion. I am someone who doesn't do exhaustion. Nor do I do rest very well either. But I learned a big lesson. I need to just sit or lay down and that is the end of that until the three weeks is up and the doctor says I can get back to my old routine. I can be so hard headed. I am also going to limit my up and down the stairs too. So it will be down to the cave and no coming up for hours....I can do a lot of quiet sewing down there which I think will be Ok. I am going to start embroiderying the coat now. Here's my Missoni:

Wednesday, November 11, 2009

Project #2 - Barter Bag!

Yesterday I just wanted to fiddle with fabrics, textures, and colors. I needed to work on a bag for a barter and this is what I have come up with so far:

Some of the components are stitched, some just placed at this point. The bag will have a gusset and straps of the herringbone and will be lined. I know, its chickens, but this person has chickens and she will just love it. DD#2 has convinced me I need to put my label on the outside. We'll give that a try for this bag but I am not sure that is going to happen again. It didn't take long to put this together and it gave me great satisfaction. I need to get some more Steam a Seam and Decor Bond to finish it and DH is taking me into town today.

The pink and herringbone are both felted wools from Ima. I could make bags forever with what she gave me. These totes really seem like a "whip up" so that may be the gift of the season this year. It's great fun to pull out the different components and work them out. One thing just leads to another and I can't wait to do another bag. The size, BTW, is 12 x 9 on what you see here.

I have not started on Sophie's dress yet. Remember only two in the cue at a time! Actually I need to get collar and cuff fabric and I think it will be tricky. Nothing in the stash works. Happy sewing......Bunny

Tuesday, November 10, 2009

LRC Part 2

I have decided to follow Gail Doane's sweet little design for the embroidery on the coat. Frankly, I am just not feeling really creative right now but do want to get this done. Handwork is easy to do right now and it is great to know that there are such wonderful resources available if you are just not in the mood.

Here is my dilemma. My jacket is red. Gail's is white. The little white wool heart on the left has been needle felted into the cashmere. It adds thickness but not in a problematic way. The green chain stitches fill in the raised edge which is kind of neat. The red heart on the right would be stitched directly on the coat. It adds no bulk and there is no change in drape. It doesn't have the contrast. the sample is definitely larger than I would use. I would use the size of the little white heart. I also am having an issue with the color of the bullion rose on the red heart. Still in a dilemma on that one. Maybe a white bullion rose?  There will be a line of the tiny buttons below the hearts and black running stitches connecting them.  So please chime in and vote for the heart you think would look best. Your critical imput here is greatly appreciated. Thanks so much. Also, the point of my samples was to check color and "look" not accurate fine stitching. I'll save that for the solution.
*************************************************************************************

Thank you, all of you, for your wonderful well wishes, prayers, and sentiments. I am definitely on the mend and walked to the end of our long drive today. I am quite fatiqued, not normal for me. But every day is a better day so I am not going to dwell on this and know that this will end soon. Again, you are all so appreciated and each so special......Bunny

Sunday, November 8, 2009

I'm Back.......

Just a quick note here to let you know that I am back and recovering as expected. I had two procedures done, a hystorectomy and a TVTO and everything is looking normal. I am tired, in some discomfort, and can only sit for short periods. I am more comfortable standing or laying down. I haven't picked up my needles at all. You will know when I do! I have spent time trying to catch up on the blogs. Thanks for all the good wishes. Keep checking. I will be back soon with the start of a smocked dress for Sophie.....Bunny

Wednesday, November 4, 2009

Felted Vest Complete

I am pretty much pleased with this. It is an old pattern from the 80's, McCalls 7255.I still think I should cut back the armscyes more. What do you think? I appreciate your input. The original princess seams were in the middle of the shoulder seam. I am thinking if I make this again, and I think I will, that I will have to move those princess seams in a bit to accommodate for the cutting in of the armscye. Dang, those narrow narrow shoulders! Other than that I like it. I like the way it just skims the body and there is still room for a sweater underneath. I am glad I did the shirttail hem. For some reason that hem seams to be flattering on women with bigger hips. In a nutshell: here is what I did to the vest pattern:

Fit Changes

* FBA
*sloping shoulder adjustment
*swayback adjustment
* Add to hips

Design Changes

*Change back to shoulder princess seams from darted back
*Add one lapel to neckline
*Change hemline to a shirttail hemline
*Lapped seams sewn with a 4.0 twin needle, a really easy construction method, no facings
*Change button positions


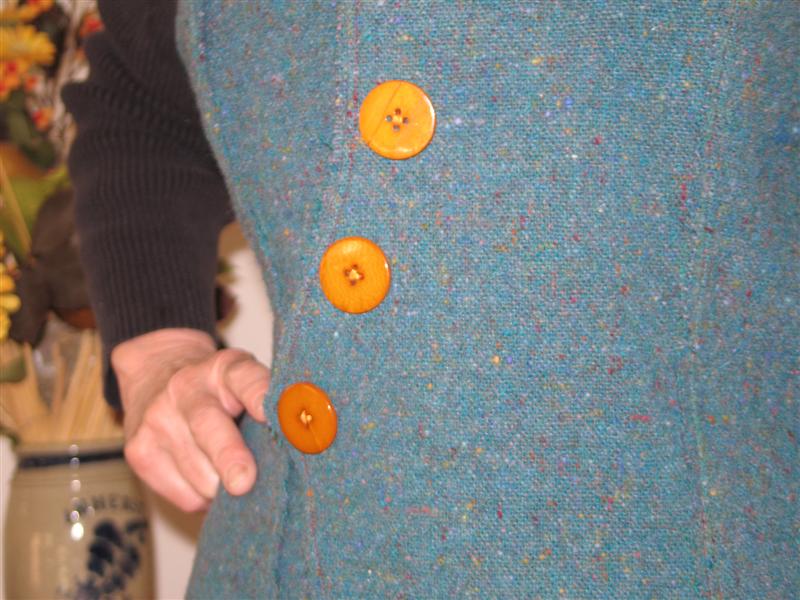
These buttons are from Ima's collection. They are heavy. The fabric is soft and fluffy like a nice wool sweater. I knew it would not support the buttons so here is what I did.

I dug in the stash for a matching piece of poly silky. I fused Steam a Seam to the back and then pinked it to the proper shape. More reinforcement behind the actual buttons was still needed so I cut little triangles of Decor Bond and dot fused them with the point of the iron where the buttons would go. Pinking helps eliminate show thru.


This was then flipped and fused to the wrong side of the vest.


The buttons were then attached on the right side using matching embroidery floss. Once this was done covered snaps were sewn underneath the buttons on the wrong side.


I used larger snaps than normal to carry the weight of the buttons. The female snaps were then covered and attached to the other side of the vest. This definitely carried the weight of those big buttons on a really soft fabric.


I  promised to show how I do a "fish eye dart" in the back to accommodate a swayback with full hips. Every time I make a blouse or some sort of top there is a big blob of fabric from my shoulder blades to my buttocks that is just filled with air. Just darting this does not take care of it, at least for me.I find I have to take out length as well as width. I read that you have a swayback if you can drop a string from the nape of your neck to your buttocks and there is space between your back/spine and the string. I have lots of space there. I find to get this right you must first have your muslin adjusted to the proper hip width. So start by adding in there if you need it and if you are swayback you more than likely do. Then I start pinching out fabric in a horizontal line at the waistline. I pinch it across this line but about 2 inches from the side seam start tapering it down to nothing at the side seam. This is what works best for me but I am always open to new techs here.You can see that here. I then transferred this change to my pattern piece. The darts were changed to princess seams and and a small amount of width was taken out that way as well. Very important to make sure the grain line is straightened once you have made your adjustments to the pattern. Then you cut.  IMO shoulder princess seams are a swayback's best friend. Why is this called a fish eye dart? If you open up that waistline dart it will be an elipse shape with the fold line down the middle, I guess sort of resembling a fish eye. . Fish eye darts are great, by the way, for getting rid of that bag of fabric under your butt when making pants.


I may not post for a bit. I have my surgery tomorrow and hope all goes well. I do have some handwork planned and ready to go. Hope to see you all around the corner..................Bunny

Saturday, October 31, 2009

Felted Vest, Part ll


What wrinkles you see here are postural, a result DH taking the pic when he wants, not when I am ready....I am really happy with this vest fit. I want to make a very big point here...I have made no adustments to the last muslin you saw. You may remember I said I would do the final tweaking on the fashion fabric. This is a perfect example of different fabrics fitting differently. My muslin was actual muslin. The vest is a felted Irish wool tweed. I guess the moral of the story here is be aware that every type of fabric will drape on your body differently. Just wanted to make that big point here. I will answer a few questions, show you some process  and then hopefully tomorrow will be able to show you the completed vest.


 Gwen wanted to know about handling felted wool in general. The tweed you see here has been put thru the washing machine on hot water, with shampoo, and then into a hot dryer, twice. You determine how much you want your fabric felted and pull them out of the machine accordingly. Different fabrics can change in different ways. I did a Pendleton wool this week that felted up so much so fast I had to pull it from the machine.When you are felting you need to check your fabric so you get it to the stage that you want and no more. This tweed is not overly felted. If I cut it, it does not ravel. It also became quite "lofty" in the process, rather spongy, something I really like. If feels like a cozy wool sweater now. Above you can see how I have done the cutting with a rotary cutter. It does not ravel even if I pull at it. That's what I wanted. Because it does not ravel you need no seam finishing and can get fairly creative with your seams. What I decided to do with my seams was use a double needle. I interviewed several different thread colors as I wanted the stitching to pop a bit. The vest needed interest. I ended up using a deep maroon color thread for all of the double needle topstitching. First I marked all the seams with my chalko liner of the right sides. Then every seam was overlapped and pinned with the marked lines being the pin lines.


 So the entire vest was pinned this way, tried on, then pin fitted to myself.  I liked the fit.  I went back to the machine and using the double needle and the maroon thread stitched on the marked seamlines on the right side of the garment. I made sure all the seams pointed to center front. I decided this vest needed a little more interest so I pinked the seam on the right side leaving a 1/4 inch before the stitching. The seams on the wrong side were cut back to the stitching, like the original.  I did the whole vest up like that. It went very quickly. Then I did some more samples and decided I would do the same double needle stitching on all of the outside seams, armscyes, hem, and neckline. In the first picture I have not cut off these areas yet. I will stitch them on the to be marked line, then cut them back to the stitching with the pinkers. To finish it off I hope to have a killer button from Ima. We will see what turns up.

Joan asked about the fish eye dart. I will show you that in the next post. It's my unofficial way of dealing with swayback. It works for me. There are so many ways to treat this issue and many question whether the swayback is an issue. Could be a shelf butt? Could. It could be a lot of other things too so this is a rather controversial fit area. I am just showing what works for me and works easily.

Cissie asked about "translating the adjustment to a pattern or did I just use the muslin". I may do either. In this case I transferred all the adjustments to the actual pattern. Sometimes I use the muslin. But I do like having the feel of the paper to use my pencil on. I just seem to see my changes better in the paper pattern. Often I will trace the muslin to Pattern Ease, not the original pattern. Here I went to the original pattern.

I hope to finish this up tomorrow. The techniques evolved as design decisions were made along the way. Sometimes I really enjoy the spontaneity of doing it that way and that was certainly the case here....Bunny

Thursday, October 29, 2009

Felted Vest

When I had my last visit to No. Andover, MA, I spent one fun day just hitting a lot of the pricey little shops there. My fashion viewpoint really needed updating and this was a great help. My favorite place is called Clay's and there I saw lots of great easy to copy possibilities. One thing I fell in love with was a felted one lapel wool vest. It had raw edges, ok when using felted fabric, and all of the seams were lapped at the seamline with the inside SA cut back to almost an 1/8th of an inch and the outer SA a healthy raw 3/8ths of an inch just hangin' out there. It had shoulder princess seams front and back, a shirtail  hemline (no hem) and one lapel. It was fabricated in a heathery green felted wool. What it cost, can't remember but definitely out of my budget. I really wanted to make this and have started.

A trip thru the pattern resource center came up with this circa 80's Nancy Zieman Creative Vest pattern. I could work with this. It had the shoulder princess seams but only in the front. I didn't like the hemline but that was going to change anyway. I did a muslin this morning. Here was the muslin out of the envelope:
I'm not showing the front because it was just fine except for the shoulders and underarms which you can see from the back. I am VERY NARROW in the back and have a smallish waist and full hips. The first thing I did was let out the side seam from waist on down. I pinned out a little on the shoulder seams, an issue I only ever seem to have on vests. I guess its lack of some shoulder pads. I pinned out a lot under the arms. Then I did a fish eyr dart at the waistline. My mother always told me I was swayback. I guess I am. Here is the next solution pinned out:

Getting better!There is still too much width in the back. Next I took it all apart and did a shoulder princess seam in the back. Here is that one:

So we are close. I will do the final tweaking when I sew the actual vest. Any comments are GREATLY appreciated so don't hold back. This last muslin looks like I need to increase the fish eye dart at the waist and maybe a little of the hipline too. One thing that concerns me is that I will wear this over maybe a couple of turtlenecks. I have one on here. I am also wondering if I should take out that sloping shoulder in order to have room for other garments underneat. Whatcha think?  Now it was on to adjusting the pattern and doing a few style alterations as well. (ETA: the neckline and armscye seams HAVE NOT been cut off yet. I am going to wait on that till construction is near complete. I don't want the armscye too low. I have already adde an inch and a quarter and will wait too all is complete before cutting off what I want.)

On the back I split the pattern down the dart and up to the shoulder seam where it  would match with the PS on the front. On the front I added my lapel after playing with it for a while on my muslin and also rounded the hemline. I am not sure I will round the back hemline. I am afraid it will sit on my swayback rump. So tomorrow I will be ready to start sewing.


Here is a closeup of the fabric. It is an Irish Tweed that I felted. It is really nice and soft. One of the internet sewing angels out there sent me this after finding it at a thrift shop for less than a dollar. Thanks, Ms. M. ! It came with the label you see which I think is so cool. My plan is to use one of Ima's fabulous buttons on the lapel or some felted roses, not sure yet.
******************************************************************************

So now you have seen my two current projects. I may cheat and pleat up some fabric just to have more handwork when I get home from the hospital. Hate to break my rules but that v. rarely happens and I think I have good reason this time.

*********************************************************************************

I have been itching to make a Chanel jacket and doing all the research. It seems every boucle I find that I like is sold out. Well, today I found some in the clearance section at Joanns and also some sweet trim. It is acrylic which in my book is a major yuk. But, I have decided that this will be my introduction to the concept and I will keep searching for the perfect wool  boucle on line. When I find that I will start a couture version, which is what I really want to do. In the meantime I have my Threads magazine at the ready with its lesson on making the faster and easier Chanel jacket.More lata'....Bunny

Wednesday, October 28, 2009

The Little Red Coat, Part 1


First, thanks to all for the wonderful, encouraging comments on Carly's Bishop. They are greatly appreciated and really do egg me on. Thanks again.

Yesterday was spent tracing off, cutting out, and interfacing The Little Red Coat. For this jacket, I am using the Swing Jacket from Gail Doane's book, Sew Cute Couture. Two of her versions are on the front cover above. Here is the line drawing:
Sorry for the dark image but with the flash it the image just glared and disappeared off of the glossy paper. You can see the back pleat and the sweet curved yoke. There are so many design possibilities and I am still not firmed up on the embellishment.


A few words on the cashmere - it has a strong nap and you need to sew it like velvet. Be careful when cutting that all pieces follow the nap, which should be going down the garment. Basting seams helps hugely. Cashmere is more like hair than wool so great care needs to be taken with the ironing. Put a big fluffy towel doubled up underneath. Always use a press cloth and iron as little and as gently as possible. To press your seams use a dauber. This is a must have for anyone doing any sort of tailoring. Take a strip of wool. Fold in half. With the fold up, wrap tightly and tie up with a tight rubber band. Instead of using steam on this fabric I dip the dauber in water, run it down the seam, (you can see the water beads in the photo) put the press cloth on top, and press with the edge of a dry iron till the press cloth is dry. I put the edge of the iron right into the seam holding the iron at an angle. Remove the press cloth and finger press. If you get seam ridges use some paper bag strips under the seam allowances as you press. Cashmere scorches very easily so all this care must be taken.

Handling the interfacing needs a soft hand. Don't beat this stuff into the fabric. Always use a press cloth. You can see how I cut back the SAs to help eliminate the bulk, one of those great Roberta Carr tricks that has always stayed with me.

The LRC will be underlined with well washed flannel but first the embroidery has to be done. I may get as much done as I possibly can except for the embroidery. I am scheduled for some surgery next week that will put me down for a bit with bedrest so will hold the embroidery until then.

Props to Gail Doane who has graciously given permission to reprint her book cover and tech drawings. She advises to check the length on the sleeves for her jacket patterns. The models used were quite tall and on them the sleeves are shorter than she would like. So double check. Thanks, Gail, for the heads up. I did lengthen the jacket, but only because I wanted it to match one Carly already has in it's length. It was increased by 1 3/4 inches. ...Bunny

Had to Refurbish This One!

    About  6 or 7 years ago , during the dawn of the Zipper Trend,  I bought one of my rare retail items. It was a blush pink and black bord...