Sewing Vloggers

Wednesday, December 28, 2011

Happy New Year!

Winter is here this morning in our little village. The visitors are all snug in their beds so I am stealing a bit of blog time before we hit the road. I will be gone till next week and want to wish you all a Happy, Healthy New Year. May your goals be realistic and be attained! I will probably not post until next week some time.

I have been pondering my goals and ambitions for the New Year. I think they are achievable. The good part is they are able to be updated and rearranged as life happens and I know it will.

* I have big home dec goals this year and sewing will definitely be part of that. As soon as we get back from our trip next week it will be off to the paint store to get things started. Our home has a "great room" type of design encompassing the living room, dining area, good sized kitchen, and office. We will be painting the ceilings, walls and trim, white trim, green walls and maybe an accent wall in the office area. Not sewing but because of this I want to slipcover the couch. That appears to be a major project but also one with major impact. This home and furniture is six years old now and everything could use a bit of spiffing up. So slipcover the couch!

* The other home dec project is my sewing room. My BFF gave me a great sculpture, kinda sorta a dress form, that goes on the wall and it looks great. I need to continue with organization, and the big sewing plan for this room is to slipcover my office chair. I can't seem to find the fabric I want, so have rethought to a white denim with some embellishment. I think I will do this before the couch because that room will be close to complete compared to the major overhaul of the living areas.

* I need more shirts. I love shirts, the kind you iron and that look crispy. I would like more white ones which I don't think anyone could ever have enough of. I have a couple of TNTs for this project so should be able to start right in on this goal.

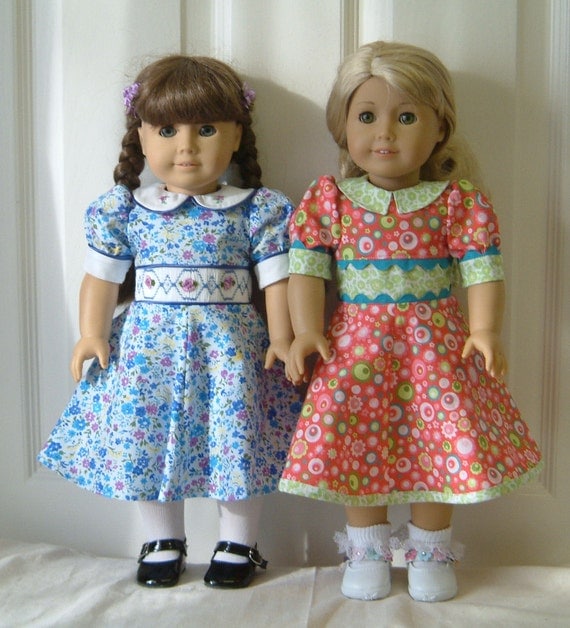
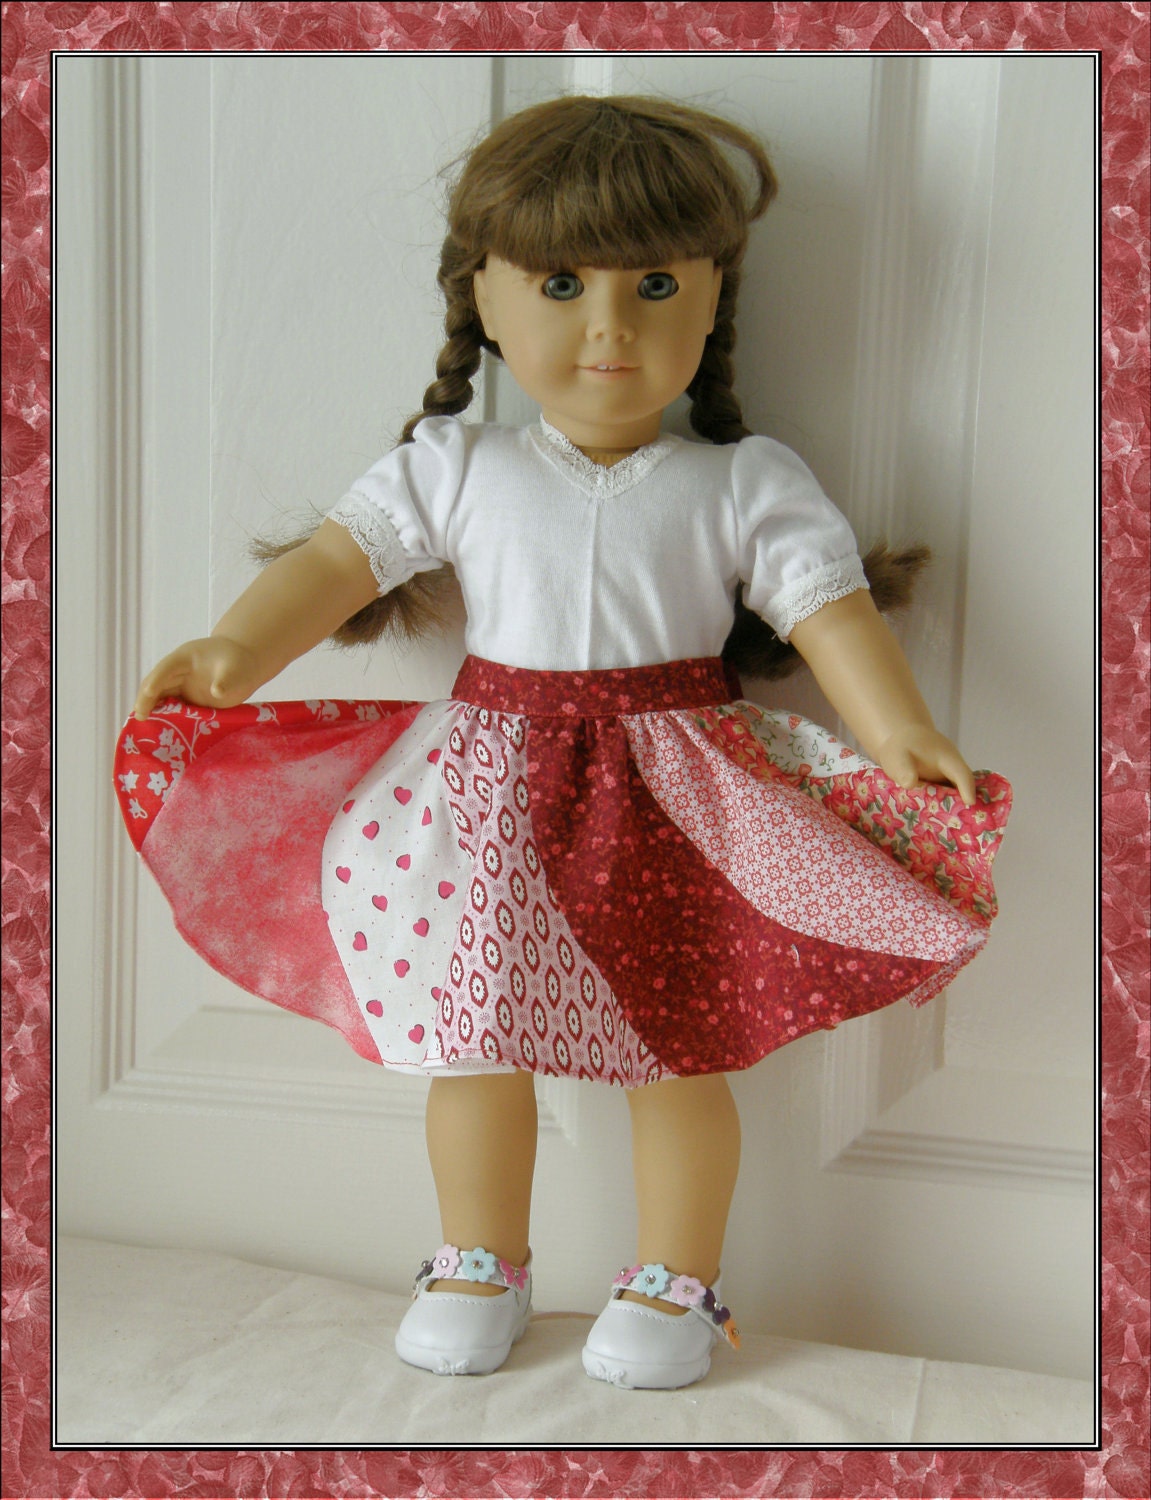
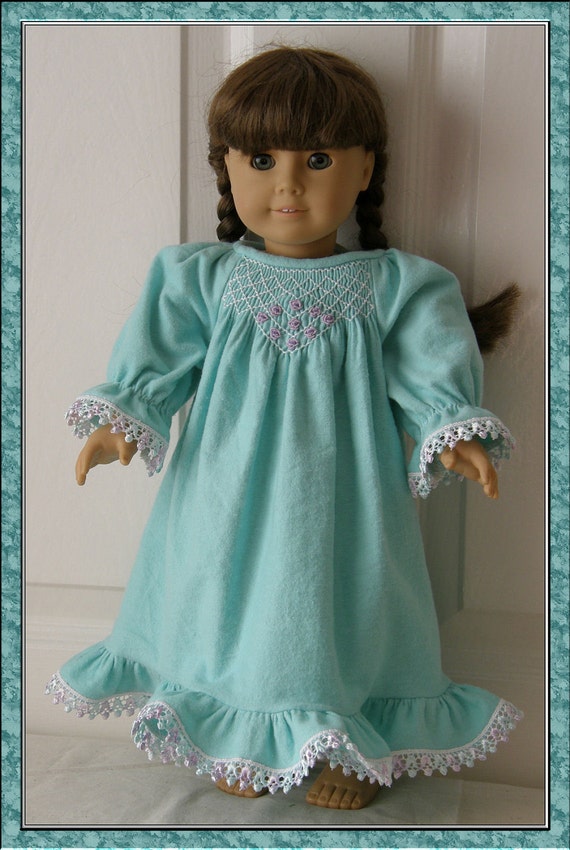
* Make more dolly clothes, the crack of sewing. They are so stinkin' cute, quick, and such fun. They have great options for creativity. The best part is to see a totally appreciative little girl's eyes light up when they recieve them. Sewing doesn't get much better than that.

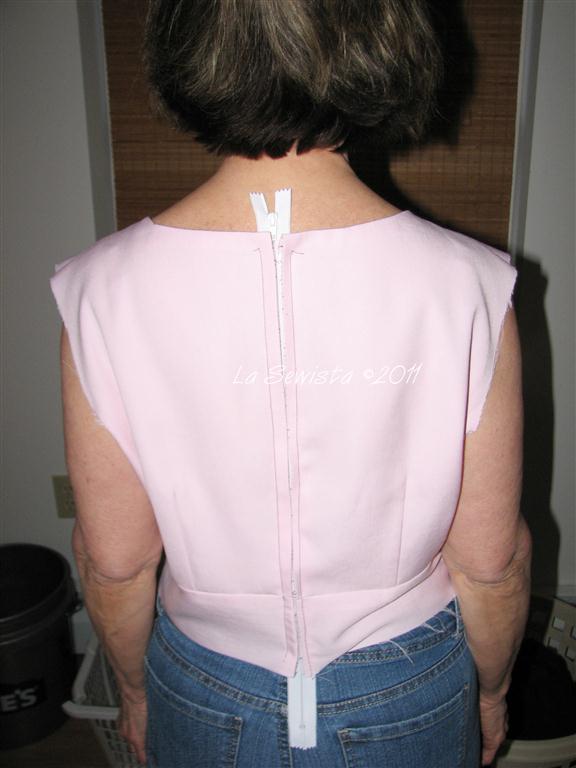
So these, other than the big couch redo, I think are all pretty manageable. Last year I did the pants a month pledge and by month six really had more pants than I needed. So I am not going to put any particularly time frame on these projects but more one of prioritizing. Right now I think it is office chair and dolly clothes. I will leave you with a darling design my friend Rett linked me to:

It is a Vogue 7486, OOP.

Thanks so much, everyone, for the lovely feedback on the red dress. We are really looking forward to this event. We don't get out like this often ; ). 

Happy New Year everyone!!!.....Bunny

Saturday, December 24, 2011

One More Time

You are not seeing double! This is the second LRD post and since there are comments on the first one I won't delete it. I value your comments too much!

DH came in, saw the pics, and suggested he retake them. Here are his efforts. It will make him happy to know I showed you all what a great photographer he is ;).

You can see I changed jewelry. I have decided to go with the original jewelry choice in the last post, a simple pearl necklace and the red crystal dangle earrings. The open neckline is much more flattering, IMO. Just too much "stuff on the bust". But the idea here is to show you the dress. As far as the shoes, I don't think  these are the ones. DDs and I all wear the same size and do much shoe swapping when we go out. I will see what they have to wear when I get down in New England and go from there. Lord, I'm built like my grandmother. Isn't amazing how you can see the way a dress hangs on oneself is the same as a deceased family member?

And I can now show you that zipper detail. The color is a bit off for whatever, but you get the drift. The zipper, an invisible one, was hand picked. Then the beads were attached after the fact. I purchased an invisible zip but later decided it would be too easy to catch the lace in it so kept the same zip and hand stitched it. Here is a great tute on how to do it: beaded and hand picked zipper from the Bending Pins blog.

So, thank you dear hubby, for taking these pics, cleaning all the floors today, polishing the candle holders, telling me I'm beautiful, and just being here with your wonderfulness for another blessed Christmas...Bunny

The Little Red Dress all ready for Christmas! (Simp 2771)


I think you can tell I am pleased. I like the dress but not the fact that I can't see the buttons on the camera without my glasses so sorry about the face glare!

The dress is very comfortable to wear and a bit heavy. The waist stay makes a big difference. I did end up hand picking and then beading the zip. It looks really pretty and is subtle but noticeable. I used three red delica beads to a stitch so it definitely shows up. 

Pattern: Simplicity 2771, an "Amazing Fit" design. It gives you options for A-D cup sizes and can be cut slim, regular, or curvy. I would have needed the curvy but that was a moot point as I chose to do a full skirt instead. Be careful figuring out the correct size pattern. Don't use their chart other than to figure your cup size. Use the pattern by your high bust measurement or whatever size always works for you and just use the appropriate bust size. I think I got a pretty good fit on the bodice. 

Fabric: Silk purse out of a sow's ear? Hopefully! I purchased this red stretch lace off the clearance table at JAs for 2.00 a yard. I know, embarrassing, but the color was spot on. The only drawback with the fabric was the lack of scallops which would have really enhanced the design further. I bought the whole rest of the bolt so had plenty for the skirt which is about a 100 inches wide. The lining, in keeping with the quality,is a red poly charmeuse. I wasn't going to put Bemberg under this lace! Just my personal fabric buying philosophy....All in all the fabrics were not difficult to sew and really the lace was quite accommodating. 

Construction: Once the fit was worked out the directions were very clear, almost too much direction! I referred to them only a bit but there are pages of directions and this would be excellent for a beginner. I treated the lace and lining as one in the bodice and separately in the skirt, therefore the hand picked zipper. This meant that at the bottom of the zipper the seam allowances were slashed at an angle and each fabric treated as a separately hanging skirt with its own seam allowance. It came out very neatly in the end. My pic of the beaded zipper is somehow erased so I will try to get that to you all later. 

I attached a waist stay. Something told me (my gut) to add a section of non roll elastic to the waist stay. Was I ever glad I did! I know I would have had difficulty getting the dress on and off otherwise. I really like the way the stay  carries the weight of the dress adding to its comfort.

I really apologize for the picture quality. I am still getting used to this camera. Truthfully, like all of you, I am sure, I am under the gun and therefore the delay in getting the pics out to you as well as not fussing too much with getting the perfect one. At this point all sewing is done. I haven't shown you  the all the AG clothes I have been making. They are cute and all packed up in their new "case" including a smocked bishop for the new addition. That took some time. And there's been the cooking. If you were here  I would make sure you got some pistachio cookies and a glass of  holiday cheer. 

I will leave you with the view we woke up to this morning. Its very cold and crisp and just the perfect amount of snow for Santa to do his work. I wish you all a wonderful Merry Christmas and a Happy New Year. I may not be posting for the next week so drive carefully, enjoy your loved ones and may the holiday be all you hoped for. God bless you all!....Bunny

Tuesday, December 20, 2011

Doll Clothes by Genine

I would love to say that I made these but they are all from my sewing friend's Etsy site: Gennie Wren.   Aside from being just stinkin' cute, Genine's patterns are VERY well produced. The patterns are well tested by other stitchers and the directions are very  clear with lots of color photos and PDF patterns to print off. I highly recommend you take a look at her pattern shop if you are doing any sewing for American Girl or other eighteen inch dolls. The pic above is of her "Lucy Dress". I love the optional smocked insert and piping, all looking so AG and professional.  On Gennie's patterns you will find creative details, not just the "generic stuff" that is out there. Aren't those details the fun stuff of sewing? Sewing doll clothes is a great way to test out new techniques and get some practice in before trying them on your own, techniques like the binding on this hem or the lovely peter pan  collars.

 
I absolutely love this knit pattern. Would you look at those cute leggings?

And what little girl doesn't like a twirly skirt?
There are nightgowns and jammies with smocking. Aren't her designs beautiful? I could go on and on. Please check out her shop and  all her patterns and know that they are all wonderful, clear, well produced, and ready to be sewn up for your little angels. Thanks, Genine, for letting me put up the great photos.  I am really impressed by your work. Oh, Gennie also digitizes embroidery and has some great designs for that if ME is your thing....Bunny


Monday, December 19, 2011

LRD continues

The sleeves have been installed. I bound the seams in the same manner that I bound the neckline using a bias strip and its raw edge.

This has turned into a bigger project than planned but aren't they all a week before Christmas? After some errand running today I will hit the dress again. Today will be the zipper and hems and then a belt for the waist, I think a bow belt. I used over 90 inches of width in the lace skirt and lining. It is heavy. The whole dress is heavy. To deal with this I will add a waistline stay when near the end and will use horsehair on the hem of the lining as well as some net ruffling underneath, all little details not originally planned on but seeming necessary. So, hopefully late today will be done! Here is the skirt and you can get an idea of the weight.


Saturday, December 17, 2011

Simplciity 2771, LRD continues...


 There are many different ways to do things in the sewing universe and I have been known to even do the same thing several different ways. What's the  Bobbi Brown song say? "That's my prerogative".   I  appreciate all the comments regarding passing on via the blog the details of sewing this dress so I will continue with something you may not have seen anywhere else. It's sort of not kosher, that's why, but it works, and I think it looks good. A little background:

The late Roberta Carr's book, " The Art of Fine Sewing" is one of my favorite references. It is all about couture techniques. She teaches in a down to earth manner and preaches in a repetitive way that makes you learn so much from reading her book. I think  I have read it cover to cover at least three times. One of her cardinal rules that oft gets repeated is "reduce bulk whenever possible". In parts of the book she may pose a problem and she goes back to that commandment to explain how to treat the issue. This saying has so stuck in my head and more than once I have dug in and followed those directions, despite what others may have taught me.  How I handled the bias on this dress is an example and I am glad I did it this way. I have also used this technique on some of my bias heirloom collars and they have worn and washed beautifully. But it is unorthodox. I warned you.

The problem: The combination of lace, lining,  and a "stay" selvedge" on the neckline is a bit of bulk. Adding the bias cut strip of poly (instead of a facing) adds still more bulk, particularly once turned to the inside. Here's what I did: Seams were graded with a pair of pinking shears. The bias strip was understitched and turned to the inside. Then came a good press to keep it there. If I turned under the raw edge of bias to sew it down to the lining there would be more bulk and a possible ridge from pressing. I DIDN'T TURN IT UNDER. I LEFT IT RAW.  No, the bias police did not haul me away. Bias does not ravel. Its edge will stay clean. So I just sewed that one layer to the underlining with a catch stitch (my favorite hand stitch) and ended up with a smooth neckline. I like this simple clean finish.

In the picture above you can see the understitching, the raw bias edge, and the catchstitching securing it to the underlining. There are many ways to do many things and I am liking this way more and more every time I use it. Point here: don't be afraid to think out of the box, particularly if an expert like Roberta Carr is nagging you from the back of your subconscious. You may come up with your own way of doing things that works just as well or  even better than somebody  else's....Bunny

Lunaloo asked in yesterday's comments:  "When you hand pick a zipper, how close are the picks to each other and does fabric choice figure in the decision to pick or not to pick?"  Fabric choice definitely plays into this decision but there are no hard and fast rules I am following here. More important is dealing with the zipper below the waist with the lace and underskirt. What I will end up doing are some samples before I commit the zipper to the dress. I will try out 1/4 inch and 3/8 inch stitches. I also purchased some beads for the zipper. I am not sure they won't just sink right into the lace so we will see. I have two size beads to work with. And after all that I may decide that I don't like the samples and may just do a plain pick. Remember what Bobbi Brown sang?....Thanks for asking, Lunaloo...Bunny

Simplciity 2771, LRD continues...

Here you see the bodice fronts taped to prevent stretching. The lace bodices are underlined with the poly and stitched all around. A poly chiffon selvedge was used to tape the bias edge of the neckline. It was cut 1/4 inch shorter than the actual pattern and the edge distributed along its length. This helps pull in the neckline to the body. If you look close you can see how the selvedge doesn't lay flat but has the fabric underneath bubbling slightly.

After I stitched the underlining to the lace and before taping, each piece was "resquared" checking for any distortion that happened in the stitching, and it did! Once we were resquared on all the bodice pieces it was sew time.

One thing I really like about this pattern, Simp 2217, is the shape built into the back bodice. If you look at the pattern piece you can see the grainline lined up with the lines on the cutting mat. Then look at the CB edge and see the curve. The curve is further accentuated once the dart is sewn and you can  see how it shapes in even  more. Nice little detail.

I should finish the bodice today. I have veered from the pattern in that there will be no facings. I have instead chosen to use a bias finish to the edge.

Another interesting  thing about this pattern is that it has you construct the entire  front and the entire back, skirts included, separately. Then there is a trial fit to adjust side seams and shoulders.I'm not doing that. The bodice will be completed with all seams sewn and then the full skirt and lining connected. This gets tricky with the zipper. You want that skirt to float freely around the zip and I am thinking of how to work that out. I am pretty sure the zip will be hand picked, not the invisible zip that was my initial choice. If I can find the right beads I may even put a bead on the zipper. Hopefully this will all be done tomorrow, or Monday the latest. Too many other things piling up around here....Bunny

Thursday, December 15, 2011

LRD Muslin #2


A little better, don't you think? and here's the front:
Almost there! I ended up cutting a size 8 in a D cup and did the "petiting" I do to every pattern.  Upon seeing the pics I've decided  to add a bit more width to the side seams to get some more ease , gotta breathe, you know! And I will alter the shape of the shoulder seams, higher toward the neck, lower toward the bone. On the muslin the armscye seams have been cut off and the neckline seam folded under. the cleavage has disappeared. I am also going to drop the waist a tad as I want it just above my natural waist not this much above. And for all you non believers in muslins out there, yesterday's muslin took an hour and a half from cut to sewn and today's muslin the same. Is this not time well spent? I think so, even if I am under the gun here. I don't know if I mentioned it but I will be doing a full gathered skirt, not the slim one in the pattern, sort of a vintage vibe. I hope to get this cut this afternoon......Bunny

Wednesday, December 14, 2011

Simp 2771 and an LRD (Little Red Dress)

It's been busy here with much production happening in the cave. First I made my DGS some jammies he requested for his birthday.
 

Pattern: Simplicity 2771, my TNT. It is unisex and carries all sized from toddler to big guy. I like that this has no collar. No one would iron a collar on a pair of pajamas so I don't want one. 

You have seen me make this several times so I won't go into too much detail. 

Fabric: Wonderful flannel purchased at the Akwasasne Indian Reservation. The quality is super, selection huge, the prices high, and it helps the tribe. I try to get all my flannel there.  Its 100% cotton and did not shrink at all!  The piping is made from the blue flannel.

Construction: I have reviewed this on PR a couple of times as well as here. The only issue I recommend paying attention to is the neckband. When I bought this pattern I assumed the band was the facing turned outside. NO, no , no! I can't tell you how much time I spent trying to make that work and I even did that on two different pairs of jammies. That's what happens when you don't read directions. Read the directions! Becuase I thought it was the facing turned outward I only cut two bands, left and right. You need to cut four. The band is attached to the bodice extending the width and neckline further. You do that with the first two bands. The remaining two bands become the facing and it is on the inside like it usually is. 

My seams are stitched, serged, and topstitched for the most part. They can be washed to death that way and will hold up. Because the fabric is printed and has a white wrong side I didn't change the thread in my serger and left it white. To make sure little peek a boos of white didn't show at corners and edges, I just took a permanent sharpie in black and colored them as you can see above. If you enlarge you can better see the arrow I put in pointing to the Sharpie ink. I also used the Sharpie to color the insides of the buttonholes, something I often do. 

Highly recommend this pattern. One day I will have the time to make myself one of these pairs of pajamas. In the meantime I need to make an LRD, Little Red Dress. 
**********************************************************************************
DH and I will be attending a posh party New Years Eve. I have decided to make myself a red lace dress. This will be a one night opportunity but because I don't get many such opportunities, I am investing a lot of effort but few dollars. I have three yards of 60 inch red lace. It is a deep cherry red, not as bright as you see above. The lining will be a red poly charmeuse. The lace is flat, the charmeuse shiny which I think will work well. My pattern is this, the "Amazing Fit" dress.

It has been an amazing muslin! According to the pattern, which I read over and over, I needed a size 14 with a D-cup adjustment. Huh? OK, I went with it out of curiosity. I usually use a size 6 and do an FBA. The cleavage is OK with me. With some make up to hide those age spots I think it will be appropriate for the evening. Whats wrong here is the width. This is a princess seam design. I really think I should use either a six or an eight and use the D cup adjustment. Somewhere underneath that billowing fabric is my back. The width on this thing is HUGE. That happens when you put a size 14 on someone who weighs 114 pounds. Under my arms is at least 3 inches that needs to come out, no kidding. Tomorrow's plan is to re work the muslin to hopefully one that will fit. I am undecided whether to play with this one or just recut a 6 with a Dcup. I have to sleep on it. That's usually when I do my best problem resolution. More tomorrow.
*********************************************************************************
It seems the CJ for the AG caused a bit of a stir and I love that. Thanks so much for your comments. 

Belinda asked about my pants pattern being on oak tag and wondered where I got such large pieces. Well, Belinda, I use legal size manila folders and connect them with duct tape after double cutting. This way they can fold up if necessary but I have recently started hanging them in a more organized manner. I think, if you want, you may be able to get the large oaktag from Dick Blick art supplies. For me its easier to just go to Kmart and pick up a pile of legal sized folders. Thanks for asking.....Bunny

Sunday, December 11, 2011

Thursday, December 8, 2011

The Leather and Lace Bag, My Own Pattern


Pattern:  As I have been making bags lately, I have given thought to shapes and styles that I like. Some bag patterns are just overdone and I have been really thinking simple. This bag is the result. It has a removable shoulder strap so it can be used as a clutch as well. It is lined with a pocket.  Its probably  measures about 9 x 11 inches. There is a cuff at the top edge and no particular closure. The front and back are connected by a gusset that is shaped, narrowing down as it approaches the top edge of the bag. It's really very simple and I will make more of this design as it should be quite versatile.

Fabric:  Once again I used the faux leather from WalMart, this time in black. For the "lace" I used a doily from the stash of many I have seemed to have accumulated  over the years. The doily was dry brushed with some jacquard fabric paint and then dipped to get the ombre effect. After that it was painted on the outer edge of the circle with a clear very very fine glitter paint. This stuff is really subtle and I am pleased with how it came out. Unfortunately, it doesn't show on the computer. It's really pretty and low key, not tacky. That glitter paint can easily get tacky so if you plan to use it go low and go slow.

The lining is one of those poly brocades from Joann's. I recommend preshrinking with a good steam press before cutting. You will see it move and shrink right in front of your eyes when you do.

The bag is once again interfaced with a piece of flannel to which fusible fleece has been attached. On the gusset there is also some Peltex fused at the bottom of the bag, where it would sit on a table.


Construction:   The gusset is shaped and turns in at the top edge of the bag. To attach the gusset  the SA that meets up with the curved edge of the bag needs to be clipped. You can also see in this picture the grading that was done. The flannel was next to the public side of the bag and left at its cut size. The other edges were graded down using pinkers. Pinkers cut faux leather like butter.
Once again, I can't stress enough that when sewing with faux leather you must resquare your piece after each seam is stitched. You can see how the bag stretch in the above picture and how I redrew the stitching line to keep it all square.
For the inside pocket I used more faux leather on the brocade. The lining is just too dark for me to show you it in the bag so this is the best pic, before construction.
I have three more bags to make. At the rate of one a day I think it will happen. I may end up keeping one for myself, maybe this one! I love this and would have bought it in a heartbeat. The camera does not do this bag justice.

Next in the queue are some dolly clothes for a fun break. First will be Chanel jacket for the AG doll (eye roll). Of course she will  have skinny jeans to wear with it but alas, I don't think I will find any platforms or stilettos to go with it. Sophie will still love it......Bunny

Wednesday, December 7, 2011

Another Bag on it's Way

My next bag is sort of a combo of the above two. I love the leather and lace, a classic go together and I love the shape of black Kors bag as well. I have loads of black faux leather. I worked out my own pattern this afternoon and hope to jump right on this tomorrow. I also dyed the lace as you will see. More tomorrow.

Sherrill asked where I got the red pleather. The red is more of the faux leather that I get at Walmart. Its the only fabric I get at Walmart and is quite a nice quality. The rest of the fabrics there, uh, no. I have had really good luck with this product and have seen all sorts of pleathers, some embossed, some checked, a few different colors.

Glad you all like the dolly carrier. It was fun, quick and I know will make one little girl very happy. My gift list is slowly getting accomplished. I am feeling some of the pressure relieved....Bunny

Tuesday, December 6, 2011

McCalls 5019, American Girl Doll Carrier


They are coming at you fast and furious! Another day, another project! This one was 6 hours on the clock start to finish.

Pattern: McCalls 5019, an doll carrier and clothing patterns for the American Girl doll, aka, the "18 inch doll" in pattern copyright speak. Easy peasy pattern.

Fabric:  100% quilting cottons, mostly from the clearance table at Joanns. This is a good size bag with a full lining and two "doll pockets" so it takes a fair amount of material compared to most totes. You can use up those scraps here and just do one fabric for the lining or whatever. I mixed and matched in and out. I wanted a look that was little girl and hip.


Construction: This was straight line construction all the way. There is a heart design provided for some Wonder Under type fused applique. I chose to satin stitch mine which is not suggested in the pattern. I can just see those hearts peeling off otherwise. Inside the bags are two pockets to hold your dolls and still plenty of room to pack you clothes for those dolly overnights!  I did veer from the pattern on the pockets, choosing instead to line them with the lighter green. This was because the black and white print telegraphed to the other side if it was self lined and looked nasty. The bag is interfaced. I used weft insertion because I had tons on hand but maybe next time would use a Decor Bond for more oomph. The bag ties together with a ribbon in the center. Can't be losing those expensive dollies and all their granny made garments!

Another gift for under the tree. What next? Maybe another bag or two. I'm on a roll. Leftovers for dinner and I am good to go!
*************************************************************************************

I really need to play with these cams for my old Kenmore. Its been years and I see a stitch or two that would really work in some heirloom applications. I don't have it on my Pfaff. All "play time" will be booked for after the holidays.....Bunny

Monday, December 5, 2011

Butterick 5576 , A Soft Clutch with Chains

 
One bag done, several more to go. We'll see what time allows. I made this yesterday and it took about six hours. I don't know who will get this as a gift. I  am just going to make a bunch of bags and parcel them out once done. 

Pattern:  Butterick 5576, the same pattern I used for the felted wool clutch seen here.  Its easy but now that I have done bag number two I will complain. I don't like how the flap is cut narrower than the width of the bag. This causes the sides of the bag to stick out and I don't like that. If I do it again, and I probably will, I will cut the flap wider.

Fabric: A red/black faux leather from , of all places, Walmart, not my go to fabric source. But I tell ya', their faux leather is quite nice and I recommend it. The lining is a 100% silk paisley that has been in the stash forever. The chains look lots better in reality than on the comp. They are a black silver if that makes sense. They are photographing yellow and they are not. They are secured to the bag in the seams with waxed upholstery thread. I got the chains at WM too. They actually have a pretty nice bead department. 

Construction: Pretty straightforward with a few techniques specific to faux leather. I mentioned a couple in yesterday's post. Always "resquare" the pattern pieces after stitching. FLeather stretches easily. I recommend sewing it on a flat bed, not with the free arm, as just the hanging of the fabric to the side will stretch it out of shape. Make an effort to keep it flat as you stitch and you will be fine. Use large stitches so you don't perforate the seam line. Rub down your needle and foot bottom with Sewer's Ease and things will flow easily. Sew Slowly! It pays here. 

This bag has a wrist strap that wasn't completed when I did the pics. The hardware is all that silver black finish which I really like. I think this will be pretty versatile and hopefully make a nice gift.
********************************************************************************
Today I started and finished McCalls 5019. Sophie, if she is a good girl, may get another AG doll for Christmas. She and her friends play with these dolls for hours. They have sleepovers. 5019 is a carrier for the doll and her accessories for when a young lady goes visiting. This worked up very fast and cutely. I'll have it up tomorrow. 
It's that time of year, gifts, dollies, and decorations... I'll post the carrier tomorrow. Think lime green, hot pink, and black and white.

Thanks, everyone, for the comments regarding my cutting mats. I do cut EVERYTHING with a rotary cutter and I am not exagerating so I may use them more than most. I appreciate all the feedback. I use an Ofa in several sizes. Maybe I will try another brand soon. I could use a more ergonomic version...Bunny


I

Had to Refurbish This One!

    About  6 or 7 years ago , during the dawn of the Zipper Trend,  I bought one of my rare retail items. It was a blush pink and black bord...